

Introduction
Chargebee is a subscription management and billing platform designed for businesses that rely on recurring revenue. It automates tasks like subscription billing, invoicing, payment processing, and revenue recognition. Invopop’s Chargebee app lets you issue locally compliant electronic invoices and credit notes from Chargebee.How it works
The Invopop Chargebee app will subscribe to new incoming invoices and credit notes. When a new document is received, it’ll be converted into GOBL, and stored in your Invopop workspace.
Once an invoice or credit note is stored, the app will create a job on the configured workflow.
Any updates and, importantly, error messages will be posted to Chargebee automatically, in the comment section of the invoice or credit note. We also recommend configuring workflows to send notifications via Slack or email to ensure any issues can be addressed quickly.
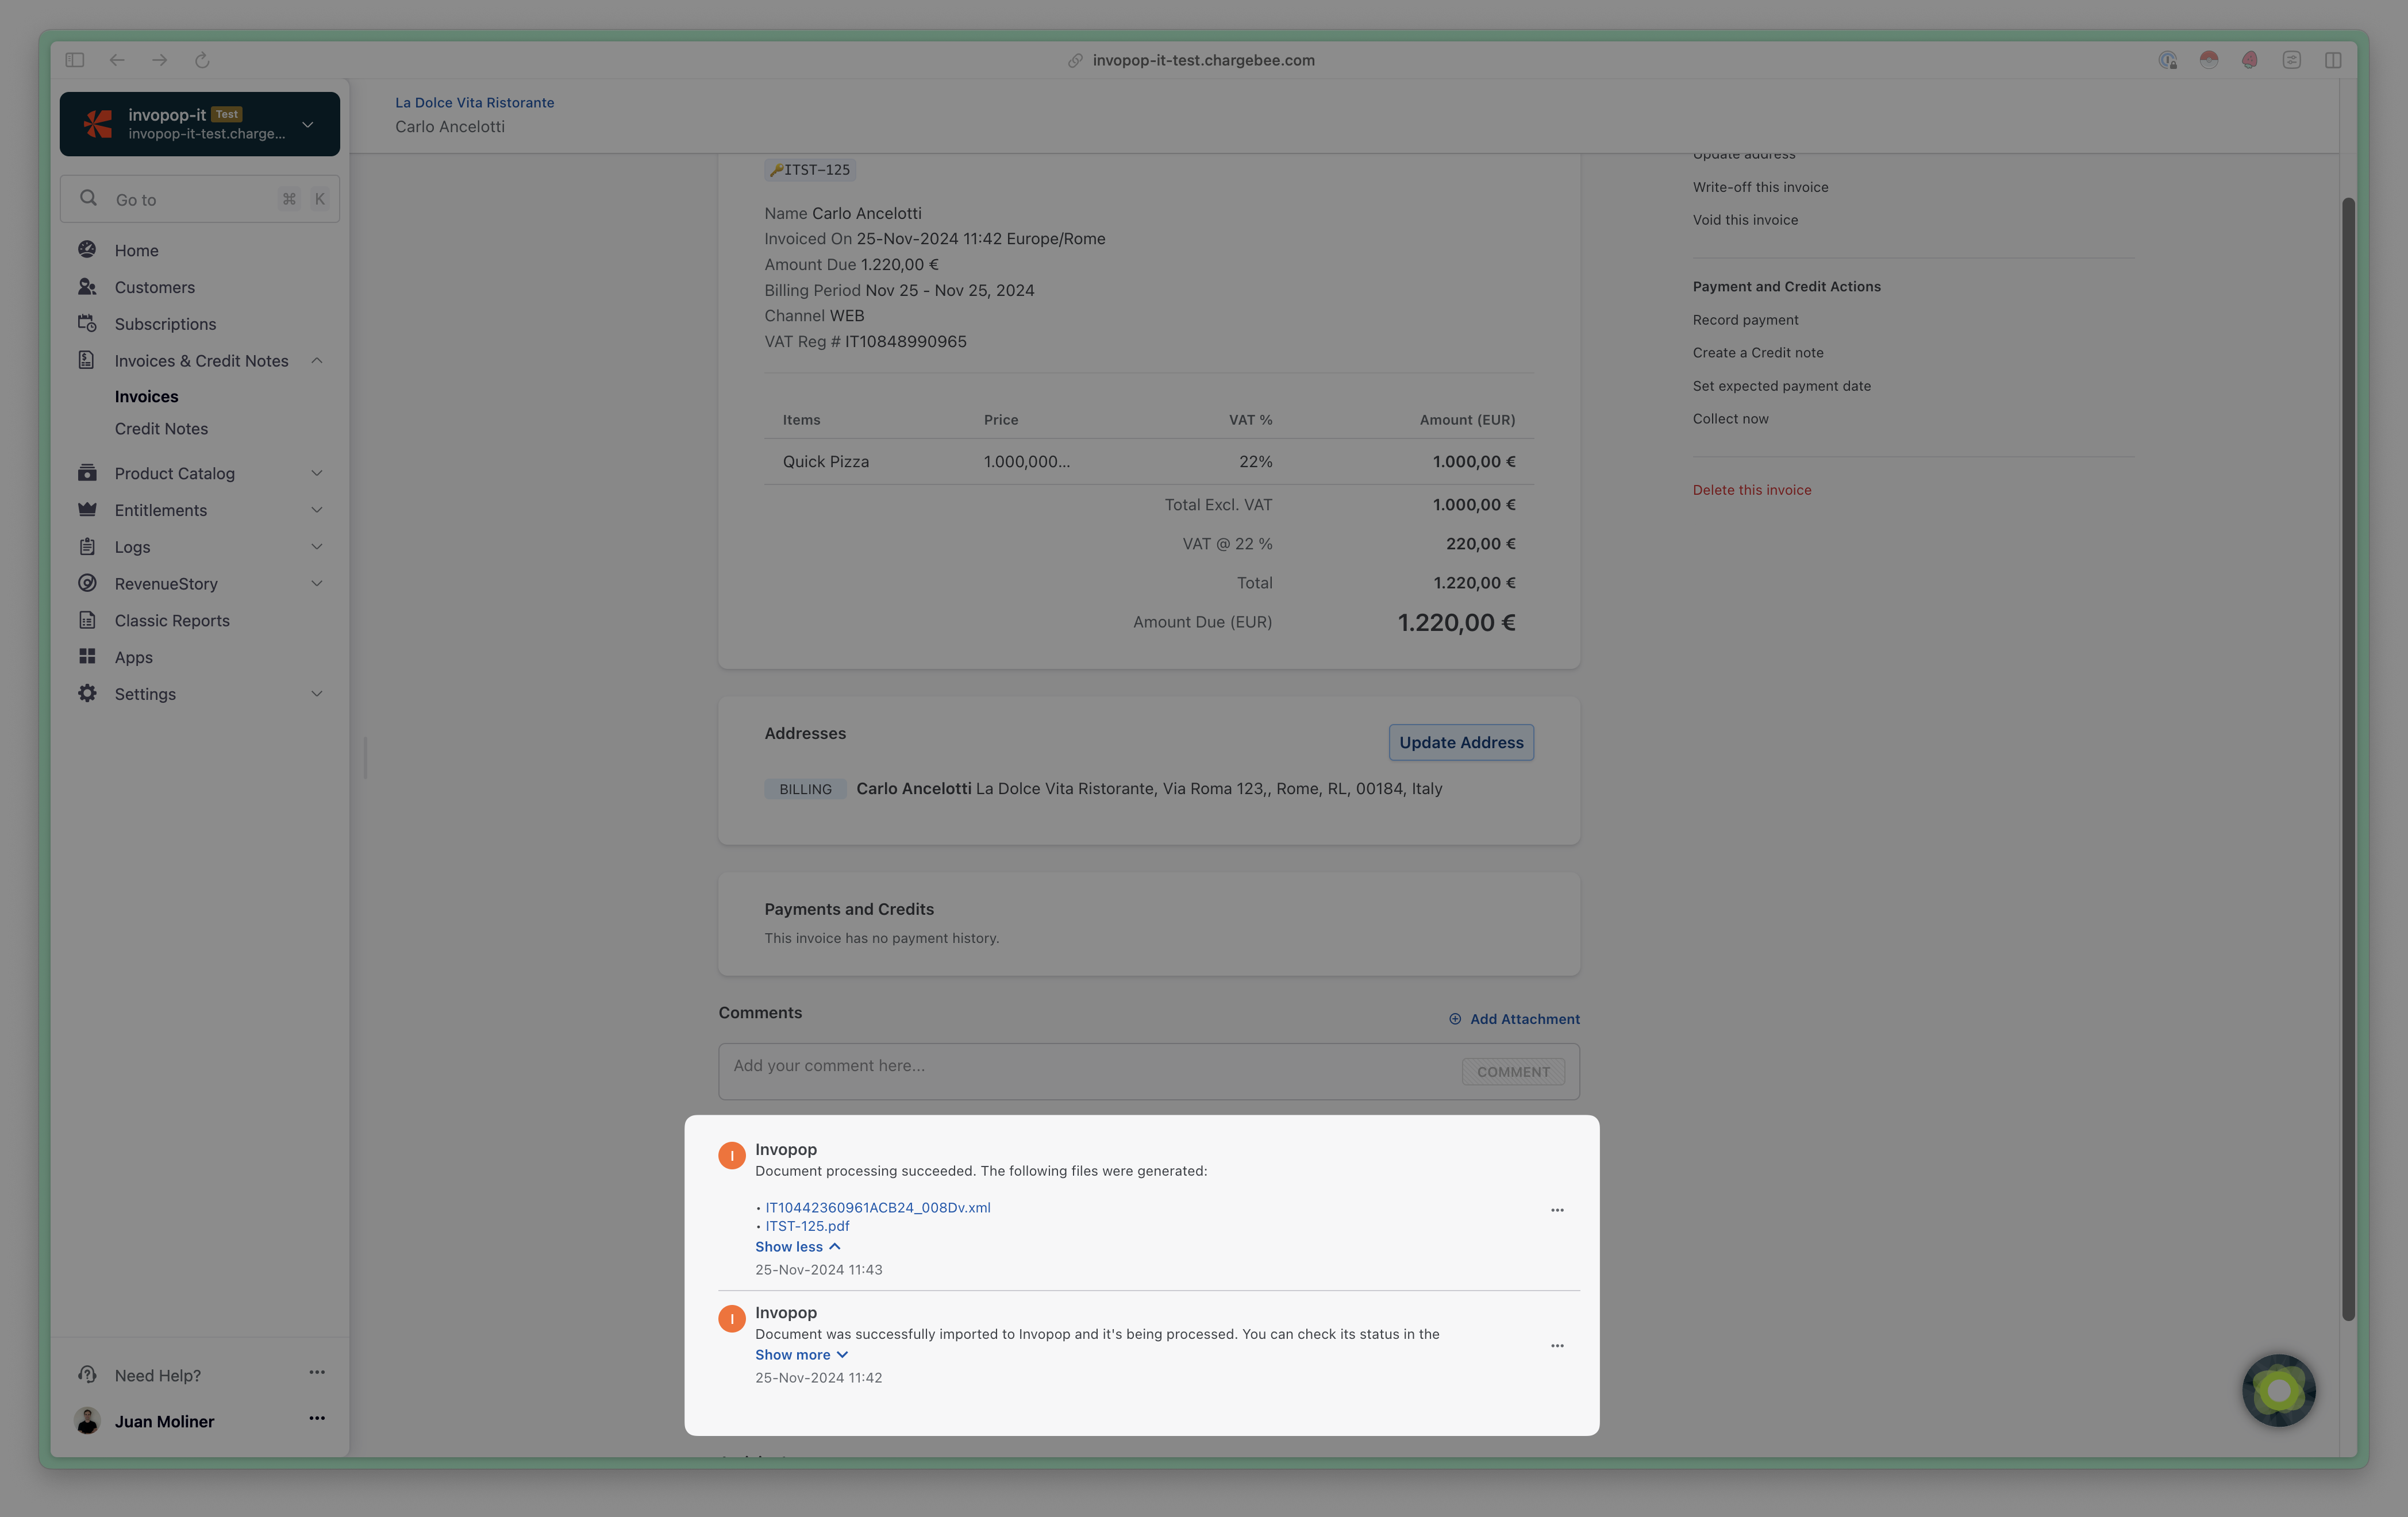
Invopop's output in Chargebee
Setup
This guide assumes that you already have a Chargebee site configured and using Product Catalog 2.0. Sites created after May 05, 2021, will have this version enabled by default. If your site was created before this date, you may need to migrate to Product Catalog 2.0. More details here.1
Create a Supplier
First we need to store the details of the supplier (the owner of the Chargebee account) in Invopop:
- In the console, navigate to “Contacts” → “Suppliers” and tap “New supplier”.
- Add the company’s contact details, including the name and tax code.
- If you’re issuing invoices from a region that requires special fields, please contact Invopop support for assistance.
- Save the document.
2
Prepare a Workflow
Chargebee Basic PDF workflow
Add to my workspace →
- Workflow
- Code
3
Connect the Chargebee app
You are now ready to connect and configure the Chargebee app itself. Go to Configuration → Apps in the Invopop console. Find the Chargebee app, then click on Connect. The app will be added to the list of active apps. Click on the app’s Configure button. You’ll see a form with the following fields:
- Chargebee Site: The identifier of your Chargebee site. It is the part of the URL when you log in to Chargebee before the
.chargebee.comdomain. For example, if your URL ishttps://my-site.chargebee.com, your site ismy-site. - Chargebee API Key: The API key used to access Chargebee. Go to “Settings” → “Configure Chargebee” → “API Keys” in the Chargebee UI to create one. Keep in mind that the used API must be a Full-Access Key.
- Supplier: The supplier that will issue the invoices. You can select the one you created earlier.
- Workflow: The workflow that will process the invoices. You can select the one you created earlier.
- Ignore Chargebee’s invoice codes: If
true, the app will ignore the invoice numbers set by Chargebee and let the workflow assign them instead. In special cases, such as Portugal and Colombia, invoice codes are regulated, and this setting should be set totrue.
- Exemption Code (Generic): The local code to be used by default on tax-exempt invoices.
- Exemption Code (Exports): The local code to be used by default on tax-exempt invoices for exports.
- Exemption Code (Reverse Charge): The local code to be used by default on tax-exempt invoices for reverse charge.
4
Enter extension data
To generate valid invoices, most tax regimes require the issuer to provide custom data specific to that regime. GOBL provides mechanisms such as extensions, identities, or inboxes to carry that custom data. Please refer to the specific regime documentation to determine what is required and available in each regime.To enter this data in Chargebee, you can either configure custom fields or attach metadata to any of these entities: Customer, Plan Item, Plan Item Price, Action Item, Action Item Price, Charge Item, Charge Item Price, and Subscription.The keys of these metadata or custom fields need to have a specific prefix and include the extension, identity, or inbox key to be properly mapped to GOBL. Refer to the Custom fields & metadata section below for the full list of prefixes.For example, to set the customer’s 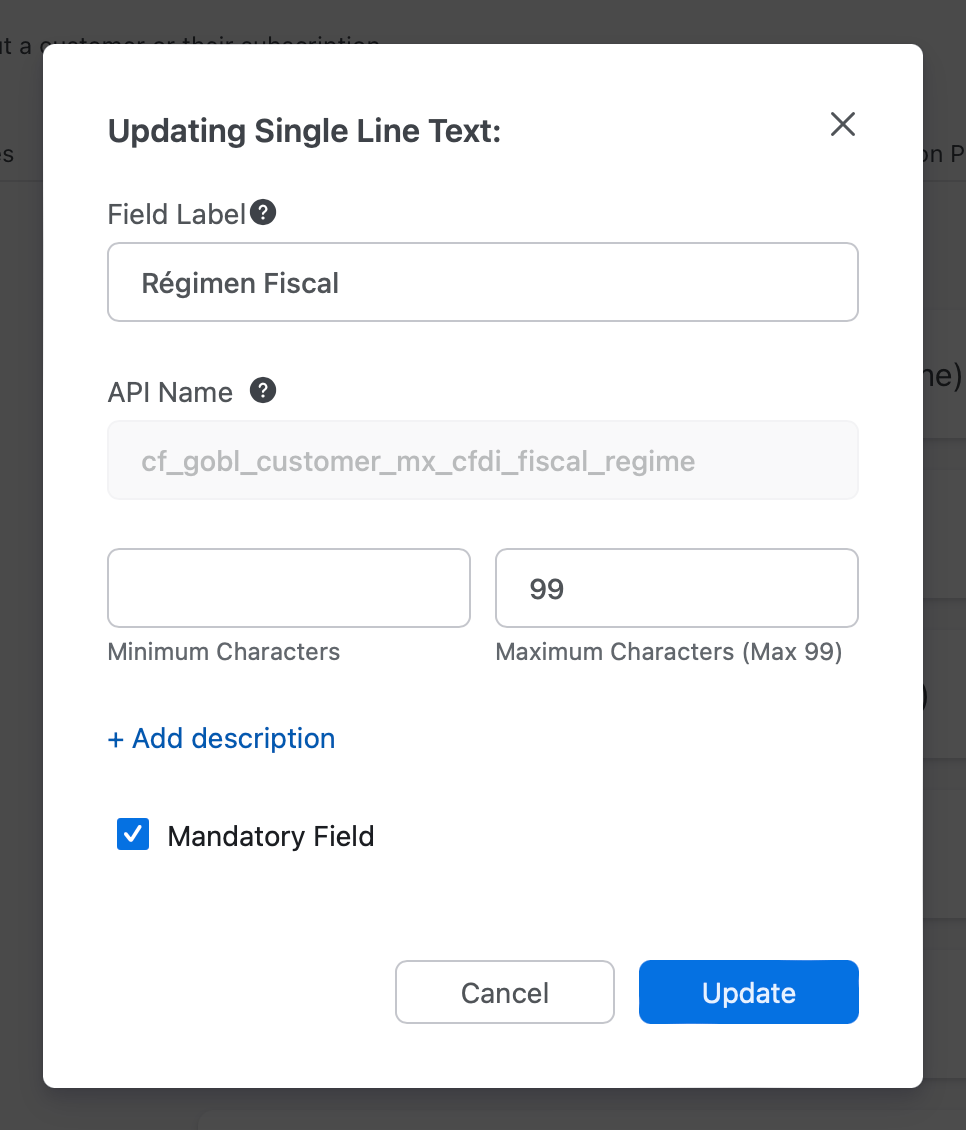
mx-cfdi-fiscal-regime extension, you must add a custom field to the Customer entity with the API name: cf_gobl_mx_cfdi_fiscal_regime (note that, being a custom field, dashes in the original extension key are replaced by underscores). You can create it in Settings → Configure Chargebee → Custom Fields:gobl-customer-mx-cfdi-fiscal-regime key (note that dashes, instead of underscores, are used in the metadata key):5
Set up a webhook
After saving the configuration in step 3, the page provides a URL to set up a webhook in Chargebee and trigger the import process. To do this, go to Settings → Configure Chargebee → Webhooks and create a new webhook with the provided URL.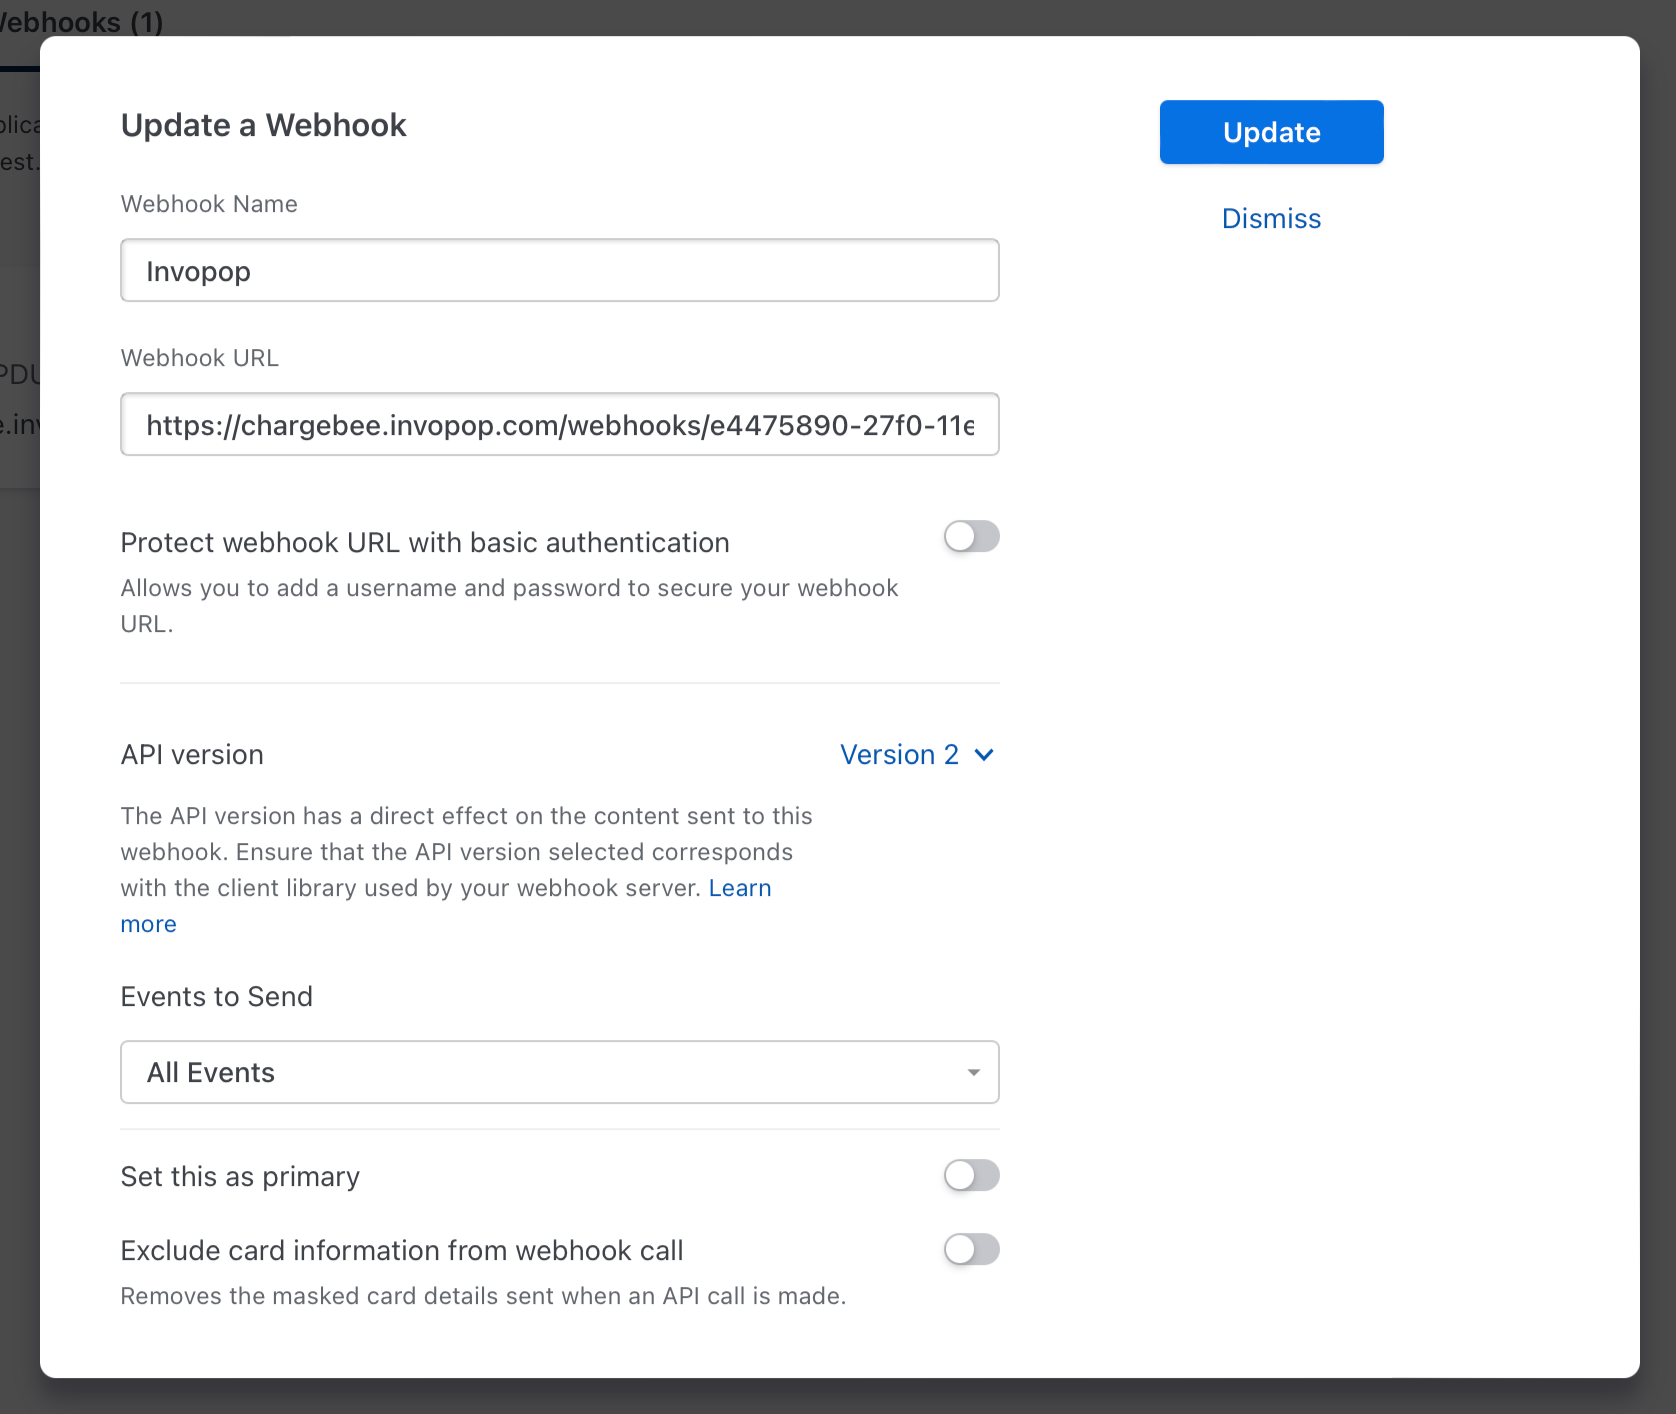
Country guides
Depending on where your customers are located, you’ll need a different workflow to comply with local e-invoicing requirements. Each country guide covers the recommended workflow template, video walkthrough, and key custom fields:
Belgium
Send Peppol BIS invoices with the Chargebee PDF attached, with automatic participant ID lookup.

Denmark
Send Peppol invoices to Danish customers with SEPA payment key handling.

France
Route invoices automatically between the e-invoicing and e-reporting flows.

Germany
Generate ZUGFeRD hybrid PDFs for B2B or XRechnung documents for B2G.
Controlling which customers are processed
By default, Invopop will process invoices for all your customers. If you only need to send e-invoices to a subset of them, you have two options — pick one, not both:- Allowlist: Create the
cf_invopop_includecustom field and set it totruefor the customers you want to process andfalsefor everyone else. - Denylist: Create the
cf_invopop_excludecustom field and set it totruefor customers you want to exclude. Everyone else will be processed by default.
Retriggering invoices
There may be situations where you need to reprocess an invoice. The method depends on whether Invopop has already created a silo entry (invoice) for it.No silo entry created (invoice not imported)
If no job was created and no silo entry exists in Invopop, you can retrigger the webhook directly from Chargebee:- Go to the Customers page in Chargebee
- Click on the customer in question
- Scroll down to History
- Go to the Events tab
- Select the Invoice Generated event for the invoice and date you want to reprocess
- Click Resend Webhook for the Invopop webhook
Silo entry already exists
Once a silo entry (invoice) has been created in Invopop, retriggering from Chargebee will not work. Use the Run Again option on the last job instead. How you proceed depends on whether anything in Chargebee has changed.Error is downstream — data hasn’t changed
If the failure happened after the invoice was already signed (e.g. the Generate UBL document or Send Peppol document step failed) and nothing has changed in Chargebee, you can simply run the workflow again:- In the Invopop console, navigate to the workflow that processed the invoice
- Find the last job for that invoice
- Click Run Again
Data has changed in Chargebee — signature needs to be removed
The Import document from Chargebee step updates the invoice with fresh data from Chargebee each time it runs. However, if the invoice has already been signed, the import step will skip this update to preserve the signature. If you need the latest data from Chargebee to be pulled in — for example, because you updated a customer’s custom fields, corrected an error, or the failure happened before or during signing — you must first remove the signature:- In the Invopop console, navigate to the silo entry for that invoice
- Click Edit, then Save — this removes the signature without altering the data
- Go to the workflow, find the last job for that invoice, and click Run Again
Custom fields & metadata
The following prefixes are used to map custom fields from Chargebee to GOBL (all of type Single line text):In addition to using custom fields, you can also set GOBL data as metadata in Chargebee. When using metadata, underscores must be replaced with hyphens, and the
cf- prefix can be omitted.For example, the custom field cf_gobl_item_br_nfse_service would become gobl-item-br-nfse-service if passed as metadata.This applies to all the fields listed in this section.
Finally, you can use the following custom fields to choose which customer’s invoices Invopop should import and which ones we shouldn’t, or to route specific customers to a different workflow:
Writing values back to Chargebee
The Custom Fields & Metadata section above covers data flowing into GOBL. The Update invoice details step does the reverse: it writes values produced during your workflow back onto the originating Chargebee document. A typical use case is recording the official reference number returned by a tax authority — for example, the Polish KSeF number — into a Chargebee custom field so it stays visible and searchable in Chargebee. For invoices, the resolved values are written through Chargebee’supdate_details endpoint. Credit notes can’t be updated in Chargebee, so for them the same values are recorded as a comment on the credit note instead.
Today this step is geared towards custom fields (keys starting with
cf_), but field keys are sent to Chargebee verbatim, so other update_details parameters can be targeted as well.Configuration
Add the Update invoice details step to your workflow (its provider ischargebee.update.details) and open its configuration. You’ll see a table where each row maps one Chargebee field to a value:
- Field — the Chargebee field name to set, e.g.
cf_ksef_number. - Value — an expr expression, evaluated against the full GOBL envelope (both
headanddoc). Document extensions are available underdoc.ext[...], while values added by earlier steps — such as the confirmation numbers returned by a tax authority — are stored as stamps underhead.stampsand can be looked up with expr’sfind()function. To set a static value, use a literal string such as"invopop".
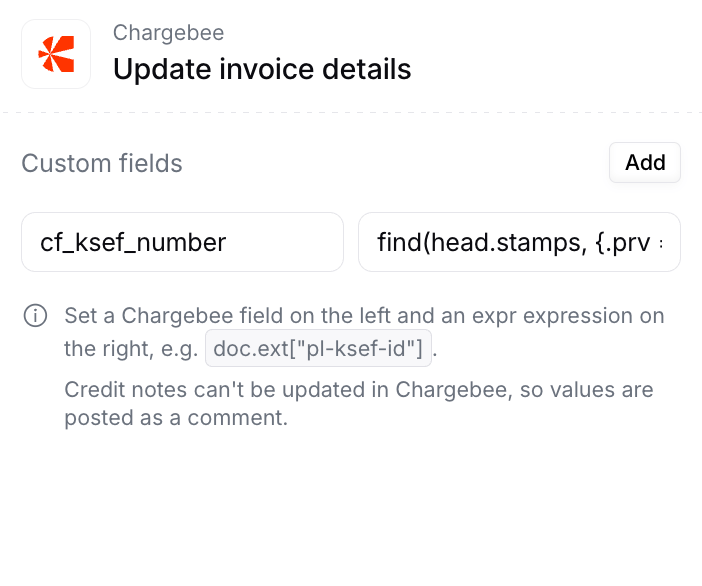
Configuring the Update invoice details step
cf_ksef_number custom field, set the value to:
.prv) is favat-ksef-number — the KSeF reference number added when the invoice is submitted — and returns its value (.val).
A few rules to keep in mind:
- Each expression must resolve to a single scalar value (text, number, or boolean). Returning an object or a list is not allowed.
- If an expression resolves to nothing (a missing or null value), that field is skipped rather than written as an empty value.
- The step is idempotent — it replaces the field values each time it runs, so re-running a workflow won’t create duplicates.
Where to place the step
The value you want to write must already exist in the envelope by the time this step runs. For instance, to write the KSeF number back to Chargebee, place the step after the step that submits the invoice and obtains that number, and typically before the final Update Chargebee step. Once the workflow runs, the resolved value appears on the invoice’s custom fields in Chargebee:
The KSeF number written back to the Chargebee invoice
Participate in our community
Ask and answer questions about your Chargebee integration →